Saturday, July 29, 2006

The soundtrack to our girly weekend...


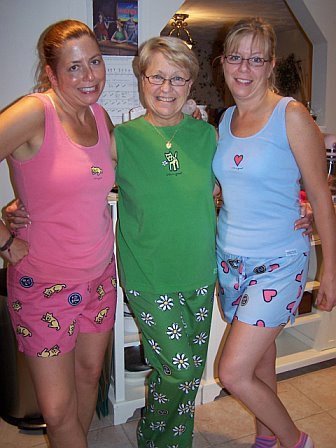
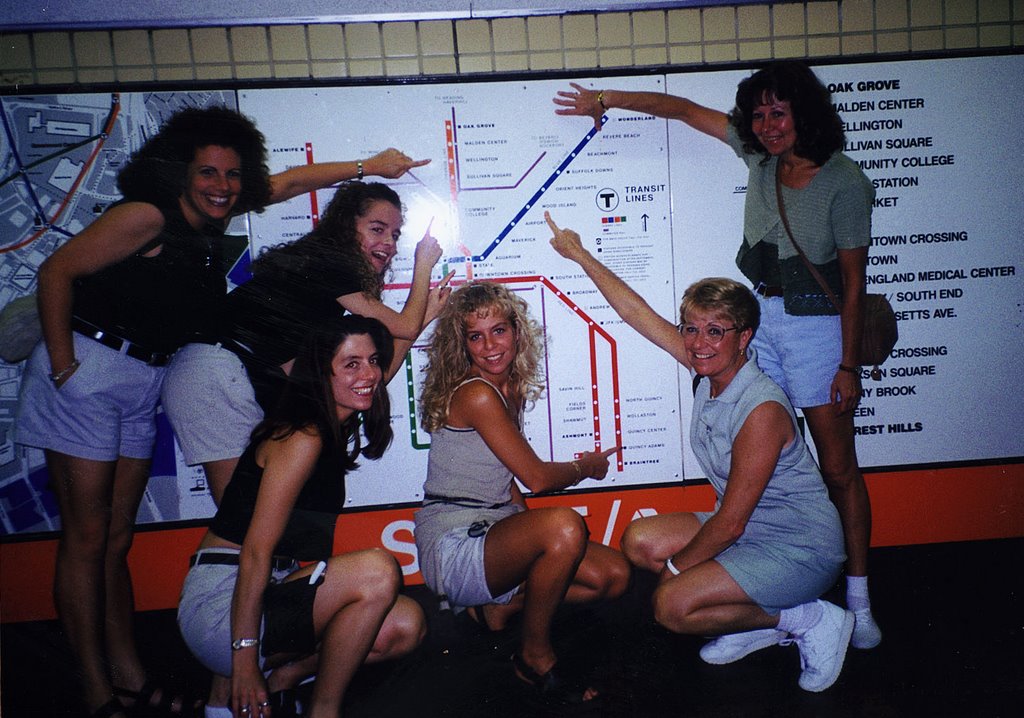
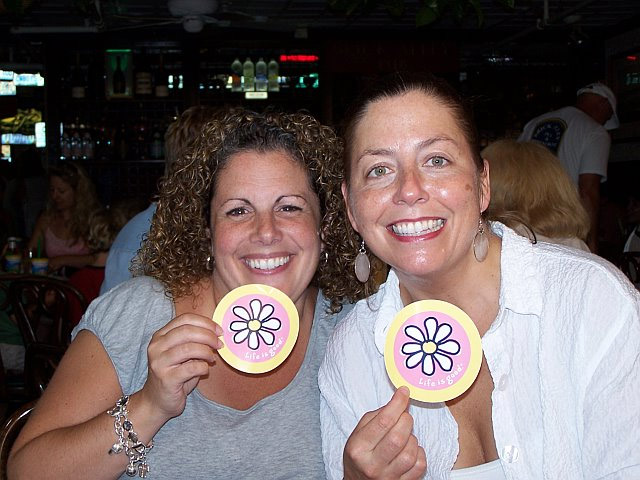
That's Liz, on the left, and me on the right, displaying our "life is good" stickers during our female bonding weekend. Liz is a real life wonderwoman, to put it modestly. She's a mom of three boys - one set of twins, and a third. For our annual weekend, she baked 5 quiche and 2 cakes, and made the whole gang the most amazing girl-power CD, which is now the soundtrack to female bonding... among the tunes on our cd are...
I am woman (Helen Reddy)
Unwritten (Natasha Bedingfield)
Respect (Aretha)
Girls just wanna have fun (Cyndi Lauper)
Man, I feel like a woman (Shania Twain)
We are family (Sister sledge)
This one's for the girls (Martina McBride)
and about 18 other fabulous girl-centric songs...
She is truly an amazing woman and an amazing friend, and when we met, I knew she would be the perfect addition to our group (she's the sister I already had two of, AND she can cook - and she LIKES IT!!!) ... but seriously, she's such a fun person and has all her priorities in order, and I'm fortunate beyond words to have found such a wonderful friend.

Friday, July 28, 2006

Studio Friday - studio music

"The vast and various sounds that surround us in our studios and add to our studio experience.
What kind of music feeds your creativity while in your studio or, perhaps it's sounds that fill the empty spaces while in your studio."
-naomi

feel the rain on your skin
no one else can feel it for you
only you can let it in
no one else, no one else
can speak the words on your lips
quench yourself with words unspoken
live your life with arms wide open
today is where your book begins
the rest is still unwritten
--unwritten, by Natasha Bedingfield

I also love this topic - I wonder if everyone else's musical preferences are all over the map stylistically, like mine are. I posted a picture of my number-one, all-time favorite voice on the planet - James Taylor, and my favorite of all his albums - Hourglass...I listen to a lot of JT, especially in summer.

The other picture I posted is the cover of a cd that my husband ordered for me after hearing this group on acoustic radio. They're called Girlyman, and they have this amazing harmony sound, and he was right, I LOVE them.

When he gave me this cd, I listened to it non-stop for weeks. There's not one song on it that I don't like the sound of. I stopped at their website, and listened to their newest cd, and now I have to have it. Honey, if you're reading this, please feel free to order it for me!!

Other sounds in my studio...
Alison Krauss & Union Station
Natasha Bedingfield
ELO
The Bee Gees
Rascal Flatts
John Mayer - I actually love to listen to him in my studio because his music is very mellow & conducive to creativity for me.
The official soundtrack to female bonding weekend...this is a cd of all women/girl power songs compiled by my wonderful friend Liz. It's an excellent cd, and I've been listening to it since she gave it to us last weekend.
...thank you naomi for such a cool topic.

Monday, July 24, 2006

life is good...


I'm back from girly weekend, and it was eventful -and fun- as usual! I personally think it was one of the best, so far, in spite of the fact that two hours after our weekend began at my sister's, I had an accident that gave new meaning to our official beverage, the bloody martha (see my 7-11 post). While slicing fruit for the sangria, I managed to slice my left thumb -I'm a lefty, so I'm not entirely sure how this happened (and this was BEFORE we had cocktails!) It was a small but relatively deep cut and it was over a knuckle, so my sister and my friend Liz accompanied me to the Emergency Room at the Metro North Health Center in Framingham, where I received four stitches and a splint to keep it immobilized. I'm supposed to have the splint on for five days, but I've removed it (on day three) because I have no patience for infirmity and I want to be able to hit the space bar instead of the letter 'v' every time I type!! I was EXTREMELY lucky that I did not sever any tendons!! But the injury did not hinder our shopping day in Newport one bit...

This year's favorite shopping spot was the Music Box Annex in Newport, which carries a huge line of "life is good-wear." The optimistic message, bright colors, and simple line art drawings on great quality cotton were irresistible to us all!
For now I will post just a two pictures - one is of the candle-lighting ceremony that we do at the end of every bonding weekend, (we found that female-symbol candle during the first bonding weekend & it was the beginning of the tradition!)The other is my mom (center) me, left, and my sister, Jennifer in our life is good jammies.
There's so much more I would like to write about the weekend and the amazing, special women that share it, but I need to rest my thumb, so I'll post more tomorrow!!

Friday, July 21, 2006

...How about "Art Studio Sidekicks?" Originally I had "four-legged" in the title. However, I know there are not only 3-legged-once-4-legged sidekicks out there, but also all sorts of companions. I'm certain that there are artists with birds as their companions and I certainly want to see and "hear" all about them!"-Debbie
I absolutely LOVE this Studio Friday topic, and not just because Debbie is one of my best friends, but because my sidekick is another of my best friends - my dog, Max. He's a two-year old mutant 'mini' schnauzer -- mutant because he should weigh 12-15 pounds, and he weighs 26!! As a puppy, I was not at all hopeful that he'd ever be a good studio sidekick, as he never sat still, and his favorite pastime was chewing anything within reach of his puppy mouth - which was a good portion of the items in my studio. So my studio had a baby gate at the door, and I took to making a lot of art on the kitchen counters, well out of his reach.

But he's now a wonderful grown up dog, and when I am at home, he is almost never more than a few feet away, whether I'm in my studio, or anywhere else in the house. I will confess that he prefers sitting in the hallway outside my studio, or nearer the door, as I am known to drop lots of things when I'm in an artistic frenzy and he has a very good instinct for self-preservation. Here he is... sitting in my studio, near the door, and in the yard, where he would prefer I move my studio.

...and now my sidekick will be riding shotgun as we head out to Boston for our annual female bonding weekend!! No blogging again until Monday, unless I get obsessed and log on at my sister's!!

Thursday, July 20, 2006

Mixed media techniques ala Misty Mawn...


One of my favorite mixed media artists was recently featured in an issue of Cloth Paper Scissors for her unique and multi-layered background techniques. Misty Mawn, who in my opinion is one of the most creative and multi-talented young artists in the mixed media art world today, wrote a jam-packed, fact-filled article with step-by-step instructions for making what I consider some of the most spectacular backgrounds. I've been wanting to sit down and try her techniques for weeks, but I had to wrap up some of my own art class planning first -- otherwise, I feared that I would like doing it so much that I'd never stop to get my classes planned!! -- And I was right! Last night I just neglected house & home, and went to town making a Misty-inspired mixed media piece, and I have to say, I was in my element. I did not have all of the supplies on her list, so I had to improvise with what I had on-hand, but her combination of painting, stamping and image transfers-to name a few-result in a textural background with amazing depth. I cannot wait to do this again!!! The imagery that I chose to add to my background is very much like Misty's --except that she is a much better painter, and her pieces are more well developed than this first attempt. I didn't want to copy, but her themes really resonate with me - winged women, birds, butterflies, gateways and openings, so it was difficult for me to imagine another way to go for my first try... and imitation is the sincerest form of flattery! Thank you Misty, for your sharing your talents with us!

Tuesday, July 18, 2006

One singular sensation...


Pictured here in a sort of 'chorusline' are the art dolls that the students made in my class at Art Connection this weekend. Everyone had a great time dying fabric, molding clay faces, threading hair, and stringing beads. It was a very tactile class, and I thoroughly enjoyed watching the students develop their dolls' personalities, as they added original elements.

Only two days until my weekend getaway with the girls. My friend Liz is busy making quiche, which will feed us at breakfast for two days (and then some.)Liz' quiche are always gooey and cheese-filled wonders, and my mouth waters for them as I write this. My sister Cheryl is shaping up our itinerary (eat, drink, craft, shop, repeat)and my sister Jennifer is organizing the sleeping and travel arrangements...which consists of "how many aerobeds do we have, and how will we fit them all into Cheryl's house?" and how many mini-vans and CRV's will we need to drive into Newport for shopping? Before our trip home, our itinerary includes a stop at the Container Store, which I am told is an amazing experience. I'll report back next week.

Saturday, July 15, 2006

Photoshop techniques...

For those who requested it, here's how to get the spattered border & palette knife technique... The techniques are not hard but the instructions are long-winded because I want to include specific details for those who are not very familiar with photoshop...
1. open the photo you wish to play with - if you like the picture, I suggest doing a "save as" to make a copy first in case things go awry and you can't undo enough to get back to the original!
2. In the menu, go to image/canvas size, and enlarge your canvas width and height by about an inch each, so that you have some border area.(so if your original image is 4 x 5, you should make it 5 x 6 or bigger)
3. Click on the color box (the black/white box) in your main menu to select a color for your frame. If you click on the black box, it should bring up a color picker - to select a color that appears in your photo, use the eyedropper tool to "suck up" color anywhere within your image - i.e.,in my sample, I took the eyedropper tool & clicked on a pink thread spool to get that pink. Then click 'okay' and that color will be your default color. Now use the paint bucket tool to 'pour' your border color all around the enlarged canvas. You should have something like this now...

4. To make your border smaller and create white space around the whole image & frame, use the rectangular marquee tool (the dotted rectangle)to select your entire photo but only about half or less of your colored border (some of the pink will be outside of the marquee on all 4 sides.) Then in your menu, click on select/inverse and your marquee will now be highlighting only the outer edge of the frame. Click backspace to delete the excess border, like this...

5. Now the fun part... Once again, use the marquee tool to draw a rectangle around your image, where the image touches your colored border; again click on select/inverse. Now click on filter/brush strokes/spatter. Select a spray radius of 25 and smoothness of 7 - then click okay. Keep clicking on filter/spatter - which should now be at the top of that menu, to increase the technique. I wanted to post another sample picture here, but I sometimes have a terrible time posting pictures - like right now. Refer to yesterday's blog for what it should look like.
6. Finally, using the marquee tool again, select just your image (no border) and then click on filter/artistic/palette knife, and select stroke size 10, stroke detail 2, and softness of 0; click okay & your image should now look like a painting.
7. Repeat step 5 to make the edges even more edgy. That's it!
Now you can use these basic techniques to try all kinds of artistic filters... and of you don't like the results, just use the edit/undo or step backward features.

Friday, July 14, 2006

Studio Friday - a view from above...


For this week's theme, I stood on a chair in my studio and took several photos that were horrible looking when I downloaded them. My studio is a colossal mess right now with two classes in the works, as well as the craft project for my annual female bonding weekend. I'm not really vain about my space, but the mess was not a photogenic one. So I kept one of the pictures, but gave it some artistic flair in Photoshop with a splatter filter for the edges and a palette knife filter for the image... a much more artistic mess now. The picture is of my colored pencils and my tool-turn-about, which is really a utensil holder from Pampered Chef.

I should also mention that when I say studio, I use the term very loosely to describe the teeny tiny spare bedroom that houses my monumental collection of papers, rubber stamps, ephemera, plastic body parts, chopsticks, pine cones, tin cans, game pieces, beads, fabric, etc. that eventually find their way into my art -- but studio sounds so much better!! I mean, who would want to participate in teeny-tiny bedroom Friday??

PS - If you want the step by step instructions for the photoshop technique, let me know.

Thursday, July 13, 2006

Meet the bonders...


...well some of them, from several years ago. I wish I could say, "yup, that's me, the leggy, gorgeous blonde in the middle." Instead I will say, that's my sister Jennifer. I'm kneeling to her left, and my sister Cheryl, our hostess, is standing above us. My girlfriend Liz is to the left of us, and on the right are my mom, kneeling, and her sister, Maryann, standing. We were obviously posing at the enlarged map of the "T," Boston's subway system. Without my sister Cheryl, who has lived in an around Boston for more than 10 years, as our guide, we would not all be looking so happy and confident at the map. We'd be perpetually lost in the city. Our official invitations arrived in the mail yesterday, and I'd post our agenda, but it's filled with private jokes that only the bonders would understand.

Cacaaaaw!

Wednesday, July 12, 2006

Eight days to bonding weekend!


Today I'm posting some pictures of my bonding journal. I designed these journals a few years after the first annual bonding weekend, as a way for each bonder to take back some memories, inspirations and memorabilia. I found the 3-ring binders at our local dollar store, marked down to 3/$1, so I bought about 20 of them.I later discovered that the special discount price was due to the fact that no sheet of paper was pre-made to fit this binder. I had to hand-cut & punch all the papers. Then I designed a totally female cover, using a collage of copyright free images. The covers are laminated and attached to the binders with eyelets.

Each year, when we arrive at my sister's house and settle in, we take out our journals and laugh at the notes & quotes & photos from previous years. Some years, the bonders are asked to bring famous female quotes or a recipe to share with the group, and these are added to the journal as well. My journal also contains each of the invitations & itineraries that my sister mails to us each year, as well as books of matches, postcards, chopsticks, & found objects from years past.

Tuesday, July 11, 2006

The official beverage of female bonding weekend...


...is the Bloody Martha. In early summer 2001, I was watching the still law-abiding Martha Stewart (or the Martha Stewart who hadn't been caught yet), and she was making red sangria. To be perfectly honest, I was more enamored with the wonderful apothecary jar in which she tossed the ingredients than the recipe itself, because, let's face it, Martha makes everything - except perhaps prison (and her own hair) -look stylish. Still, to have a bit of fun, I visited Martha's website & downloaded the recipe. I also took some liberties with her original photo, and made a recipe card for all of the bonders - which I've featured here.
...Well, the Bloody Martha was more popular than a hot stock tip. Everyone loved it, and we've been making it ever since. My sister Cheryl even found the same stylish apothecary jar at Crate & Barrel in Quincy Market during our shopping trip that year, so our Bloody Martha's are as pleasing to the eye as they are to the palate. Of course, we're always looking for new ways to celebrate, so feel free to share your favorite (alcoholic) beverage recipe, and I'll share them with the bonders this year.

Monday, July 10, 2006

Tote-ally fun totes!!!


As I mentioned yesterday, the arts & crafts project for our annual 'female bonding weekend' is going to be a decorated tote bag. While I could let this be a free-for-all, and let everyone just make their own thing, this group (with only a couple of exceptions), is not very artsy-craftsy, so I'm being a control-freak and making up kits. I will allow for some flexibility, but not too much!! Here are the kits I've done so far (I have to make a dozen.) The items are not yet attached to the totes, but I've photographed some suggested placements for those in our group who lack imagination or who've had too many Bloody Marthas (recipe to follow in a later blog). I think these bags would look great painted, too, but our weekend is so packed with activities that our craft project really has to be quick & easy...


Since this is the 10-day countdown to bonding weekend, I am going to try to post a little something on the topic everyday. Tomorrow I may feature pages from my bonding journal, or the recipe for a Bloody Martha, the official beverage of Female Bonding Weekend. - stay tuned!!

Sunday, July 09, 2006

Busy weekend planning classes...


I've spent the better part of my weekend, including Friday, planning classes that I'll be teaching later this summer, and I can't wait to post some samples, but my camera hook-up is at my office, so it will have to wait until at least tomorrow. The first class is one using transparencies, inspired by the Somerset Studio book, Transparent Art.
The second project - totes for tarts - I'll be teaching to the attendees at our annual 'female bonding weekend.' -- My sister Cheryl began this tradition from her home outside of Boston more than 10 years ago. It's an annual event that includes an arts & crafts project on the first evening, and then lots of shopping, laughing, eating & drinking all weekend. Each year is a little different, with planned and unplanned activities. Most years we've trekked through the city of Boston, but last year, we rode into Newport, RI, for some new shopping territory to conquer. The group varies slightly from year to year, but always includes my two sisters and me, my mom & her two sisters, and a wonderful group of friends who add to the fun and flavor of the weekend. We all stay at the Ritz-Cheryl (also known as my sister's home) & we inflate our aerobeds each evening. We each keep a bonding journal that we add to from year to year -- a 3 ring-binder packed with notes & photos & trinkets from our travels. I will post photos of previous bonding adventures as the date approaches, and I'll take pictures of the totes to share with you after the weekend is over.
Today's photo is one of my favorite journal pages... I may even have posted this already in a previous blog, but I love it - the color - the messages, so if I've already shown it, I apologize for the re-run!

Saturday, July 08, 2006

ingredients for achieving balance...


8 parts sleep
2 parts exercise
7 parts work
4 parts fun & relaxation
1 part introspection
2 parts everything else
(note: your own ingredients will vary based on the flavors you enjoy in life.)

Fold gently. Bake at 75 degrees in the sunshine. Enjoy with a glass of wine or a very cold beer.

I planted these shasta daisies more than a year ago, and the have finally bloomed. It took a great deal of patience for me not to rip them out and plant something else, because the plant without flowers is rather stalky and unattractive. Now, I love how they peek around the corner of our house so cheerfully. --A lesson in how patience rewards us.

Friday, July 07, 2006

Studio Friday -"seven layer salad"


"... using 7 layers to produce a piece of art. Have you done anything using only circles or only triangles (squares etc.) I loved the challenge of creating with the brush in our teeth! Maybe creating only using pieces of Matt board for the impliment to apply paint! I do that with my students at school and they produce some really interesting things."

I did not have time this week following the fourth of July holiday to create a new piece of 7-layer art, so I am posting some greeting cards that I made awhile ago...some have seven layers, some have six. They're made with a variety of textured papers, and topped with rusted metal shapes that are bound with wire and beads... the papers were in a "paper by the pound" pack that my generous friend Sharon Green gave me, ages ago. The papers in these packs come in all shapes, sizes, imprints & textures, so they are very easy to layer into a collage or on greeting cards.

Wednesday, July 05, 2006

Oceana - the art doll


Here's a look at the second version of an art doll I've designed for an upcoming class... I've named her Oceana,for her blue gown, and wavy hair. Her armature is made from a stick, and wire for the arm, so the class is called Stick Figure Femme, and is being offered at a new art store and studio in Scotia, New York, called the Art Connection. The first class will be held on Sunday, July 16, and a second offering will take place on Saturday, August 12.

The first version of this doll was inspired by a stick that had an arch-shaped branch for an arm, rather than wire. I featured it in an earlier blog entry.

I have to say, although art dolls are not my first art form, I absolutely love the creative process once I am involved. It's so much fun watching them "come to life."

For those who are interested in process, her face is polymer clay with Pearl ex pigments, her clothing is a muslin strip died with Dye na flow, and patterned with rubber stamps, her hair is multilayered strands of fibers and yarns, and hanging from her wire arm is a seashell from a previous trip to Sanibel and Captiva Islands in Florida.

Saturday, July 01, 2006

"Because I'm worth it..."

...I spent $7.95 (plus tax) at Walmart for Loreal Preference, #UL61, ultra light ash brown (ultra lightening no brass technology) - which was supposed to turn my dark brown hair a very, very light brown (almost a dark blonde) and instead, turned it, well BRASS!!! I look nothing like the model on the box (okay, I looked nothing like her before, either) but neither does my hair. I suppose I should not be surprised at this result for a whopping $7.95 (plus tax), but all those Sarah Jessica Parker commercials really convinced me that I would be fabulously happy with the result. Maybe I'll just paint some Golden acrylics in ochre next time, with a #2 sable brush.

So while we're on the topic of brass, here are some great keys that my husband found for me at a recent auction. He brings back some fabulous treasures for me to incorporate into my artwork. They were apparently rusty pieces that some old git found with a metal detector.